Set up contracts

Use contracts to connect compensation rules and work RVU credit policies to the correct locations so RVU Wallet can apply them when you record encounters.

Create a new contract

New Contract screen showing compensation type, start date shortcuts, expiration toggle, locations, salary, add incentive, and work RVU credit policy
  1. Tap the Profile icon in the top-right corner of the app.
  2. Tap Contracts, then tap Add Contract.
  3. Do the following:
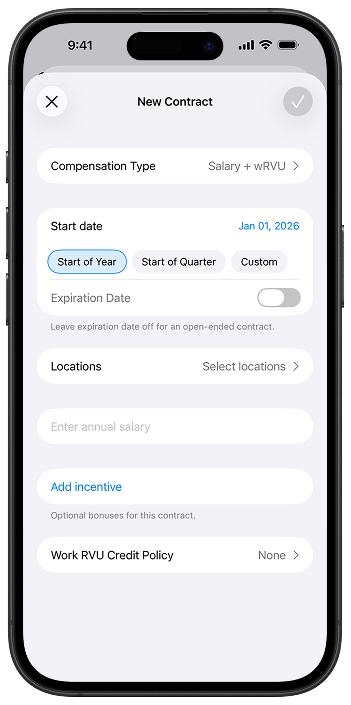
    • Select a compensation type
    • Choose when the contract started: Tap a start date
    • If the contract is ongoing, do not enter an expiration date
    • Choose all the locations that the contract applies to
  4. Tap Add incentive, then do any of the following:
    • Choose a payout type: Hourly, Fixed, or Percentage
    • Choose pay period: Monthly, Quarterly, or Yearly
    • Enter the threshold to trigger the incentive
    • Enter the amount: Enter a fixed amount, percentage, or hourly rate
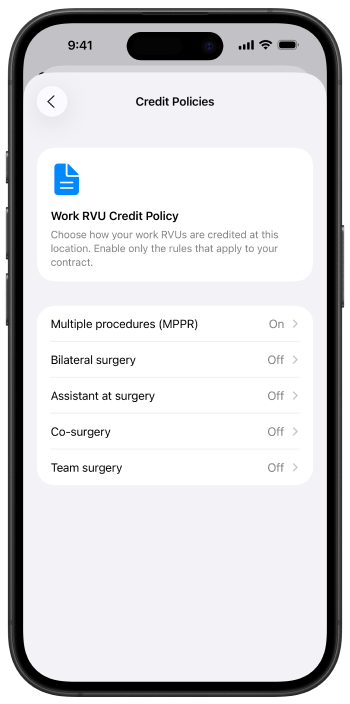
  5. Choose the wRVU credit policies: Select the policy that matches how your organization credits work RVUs

Select work RVU credit policies

Use work RVU credit policies only if your organization adjusts credited work RVUs for compensation.

Note: By default, RVU Wallet does not adjust the underlying work RVUs assigned to a code. Turn on only the policies that match your organization's credited work RVU rules.

Credit Policies screen listing MPPR, bilateral surgery, assistant at surgery, co-surgery, and team surgery with on or off status
  1. From the contract screen, open Work RVU credit policies (Credit Policies).
  2. Read the short explanation at the top so you only enable rules that apply to your contract.
  3. For each policy row, set the status to On or Off to match your organization.
  4. Tap the back control when you are finished.

See also